

Head Chef 1 User Guide · Chapter 1
Getting started
This chapter takes you from a fresh start to your first saved session. You choose the audio device Head Chef plays through, create, open and save sessions, and then build a short song with an instrument part, a drum part and a quick mix.
Open Head Chef #
Head Chef is a desktop app for macOS. Open Head Chef from your Applications folder like any other Mac app.
The menu bar sits at the top of the Head Chef window, with the File, Edit, Settings, Track, Add Instrument, View, Options, Window, Transport and Help menus. The workspace describes each one.
The welcome panel #
When no session is open, the middle of the window shows a panel titled Make a start. From here you can:
- click Start a Jam in the green Jam Console card at the top to roll a backing band, play along and keep ideas without creating a Session. See Jam.
- click Open Session… to open a session you saved earlier;
- click New Session… to create an empty or ready-to-play session;
- click Import Audio… to start from audio files you already have;
Recent sessions keeps your last eight opened or saved sessions, newest first, even after you quit. Click a name to reopen it. Use Open Session… to locate a moved or unavailable file.
When a session is open but has no tracks, the panel reads This session has no tracks yet and offers Add Instrument Track…, Add Mono Audio Track and Import Audio….
Choose your audio device #
Head Chef plays through one output device and records from one default input device. Set them before you start working.
- Choose Settings > Audio Engine… or press ⌘,.
- In Output Device, choose the interface, headphones or speakers you listen on. System Default Output follows the output chosen in macOS. Each device shows its channel count, for example (2 ch).
- In Default Recording Input Device, choose the input Head Chef uses when you record. System Default Input follows the input chosen in macOS.
- In Buffer Size, choose a buffer size from 32 to 2048 samples.
- In Level Meter Style, choose Tri-Zone Studio (Emerald / Amber / Coral) or Monochrome Cyan-Mint. The meters change as soon as you choose.
- Click Apply. Cancel closes the dialog without changing the device or buffer.
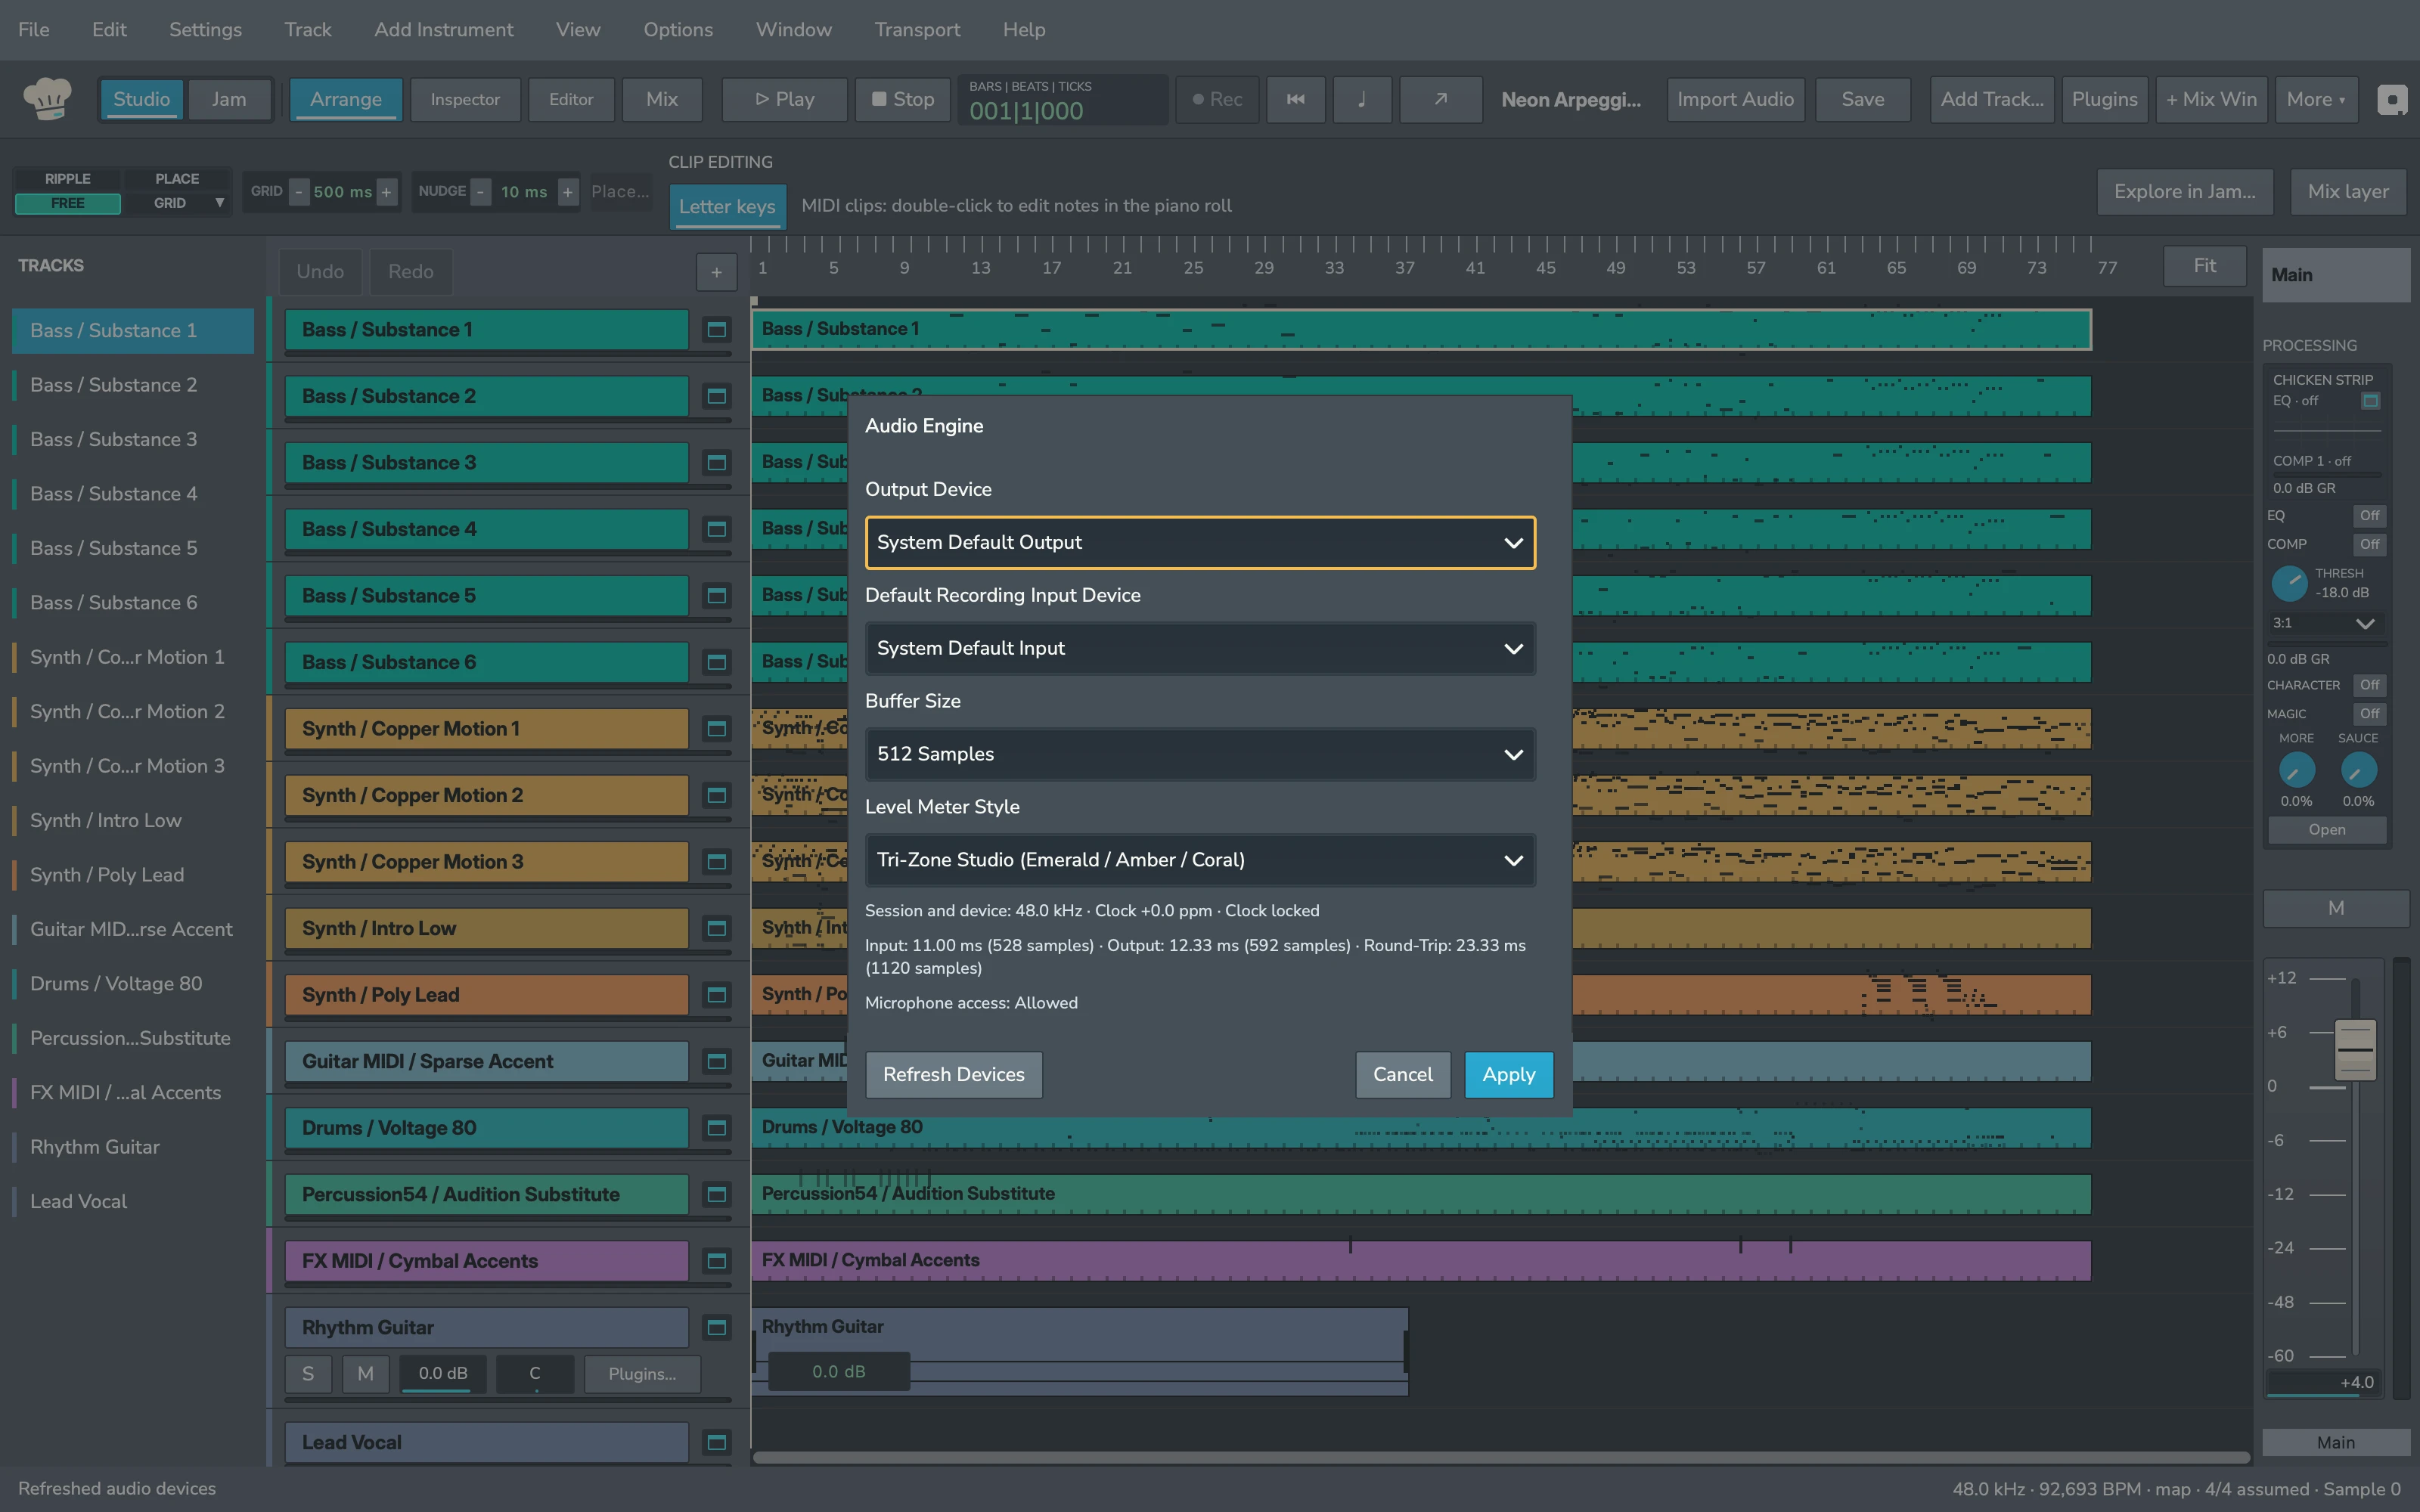
If you plug in a device while the dialog is open, click Refresh Devices.
The lines under the menus tell you how the engine is running:
- the session and device sample rate, and whether the clock is locked;
- the input, output and round-trip latency, in milliseconds and samples;
- Microphone access, which tells you whether macOS allows Head Chef to use your inputs.
When the session and the device run at different rates, the dialog says so. Play switches the device to the session rate when the device supports it.
You cannot change the audio engine while a recording is in progress.
Create a session #
- Choose File > New Session… or press ⌘N.
- In Session name, type a name. The default is
New beat. - In Sample rate, choose 44.1, 48, 88.2, 96, 176.4 or 192 kHz.
- In Start with, choose No tracks, Mono audio track, or one of the built-in instruments: Mini Bar, Voltage 80, Voltage 78, Substance or Octet.
- If you chose an instrument, pick its starting Sound.
- Click Create.
A new session is eight bars long at 110 BPM in 4/4, as the dialog shows. You can change the tempo, time signature and sample rate later in Settings > Session Settings…. See Tempo and session settings.
To start every new session the same way, set the sample rate and starting track, then click Use as Default. Head Chef confirms with Saved for future sessions.
If the open session has unsaved changes, Head Chef first asks Save changes to this session? Click Save, Don't Save or Cancel.
Open a session #
- Choose File > Open Session… or press ⌘O.
- Choose a Head Chef session file, which ends in
.headchef. - Click Open.
You can also drag a session file from Finder onto the Arrange timeline. The Open dialog also accepts other session and MIDI file types; see Importing.
Save your work #
- Choose File > Save Session or press ⌘S. The first time, Head Chef asks for a name and location and saves a
.headcheffile. - Choose File > Save Session As… or press ⌃⌘S to save a copy under a new name.
- Click Save in the toolbar. While a session has unsaved changes, the button reads Save • and a dot follows the session name.
When you close the window with unsaved changes, Head Chef asks whether to save them first.
Undo a change #
Choose Edit > Undo or press ⌘Z to step back one edit. Choose Edit > Redo or press ⇧⌘Z to step forward again. The Undo and Redo buttons above the track headers do the same.
Make your first song in ten minutes #
This walkthrough builds an eight-bar loop with keys and drums, then mixes and exports it.
Start the session #
- Press ⌘N.
- Type a name, leave Sample rate at 48 kHz, and choose Mini Bar in Start with.
- Pick a Sound, then click Create.
The session opens in Arrange with one Mini Bar track holding an empty eight-bar midi clip.
Write a keys part #
- Double-click the Mini Bar clip. The piano roll opens.
- Double-click on the grid to add a note. Drag a note to move it, drag its right edge to make it longer, and press Delete to remove it. Press Q to quantize.
- Press Space to hear the part. Press Space again to pause.
- Click Close to return to Arrange.
If you have a MIDI keyboard connected, select the track and play. Head Chef plays the selected instrument track from any connected keyboard. See MIDI and instruments.
Add drums #
- Choose Add Instrument > Voltage 80. Head Chef adds a track named Voltage 80 with its own empty clip and opens the instrument's window. Close the window when you are ready; the Open button on the track header brings it back.
- Double-click the Voltage 80 clip and add drum hits in the Piano Roll.
- Click the ♩ button in the toolbar to turn on the metronome click while you check the timing.
- Press Return to go back to the start, then press Space to play both parts together.
Mix and export #
- Click Mix in the toolbar, or press ⌘=, to see a channel strip for each track. Balance the faders until the drums and keys sit well together. See Mixing.
- Press ⌘S to save the session.
- Choose File > Render Mix… or press ⌥⌘B to write the song to an audio file. See Rendering.