

Head Chef 1 User Guide · Chapter 8
Tracks
This chapter shows you how to add tracks to a session, find your way around a track header, and keep a growing session tidy. You will add mono audio tracks, instrument tracks and Effect Returns, select and resize tracks, use solo, mute and record arm, and work with the folders, groups and VCA masters a session can contain.
Add a track #
Head Chef offers several routes to the same result. Use whichever is closest.
From the Add Track dialog #
- Click Add Track… in the toolbar. In a narrow window, open More ▾ and choose Add Track….
- Optionally type a Track Name and click one of the Color swatches.
- Under Track type, choose Audio · Mono track, an instrument, or an effect.
- Click Create, or double-click the track type.
Choosing an effect in this dialog creates an Effect Return that uses that effect.
From the Track menu #
- Choose Track > Add Track > Add Mono Audio Track, or Track > Add Track > Add Instrument Track and then an instrument.
- To add an Effect Return, choose Track > Add Effect Return and then the effect it should use.
The Add Instrument menu in the menu bar lists the same instruments and adds an instrument track in one step. When you add an instrument track, Head Chef opens the instrument's editor so you can start choosing a sound.
From a context menu or a button #
- Right-click an empty part of the timeline, or the empty area below the last track header.
- Choose Add Mono Audio Track, or point to Add Instrument Track and choose an instrument.
The + button above the track headers adds a mono audio track straight away. A session with no tracks also shows Add Instrument Track… and Add Mono Audio Track buttons in the middle of the window. You can also drag a plugin or an instrument from the Plugin Browser onto the empty area below the track headers, which reads + Drop plugin or synth here to create track; see Plugins.
If no session is open when you choose a track, Head Chef first opens the New Session dialog and adds the track once the session exists. Adding a track is one step in the edit history, so Edit > Undo removes it.
Read the track header #
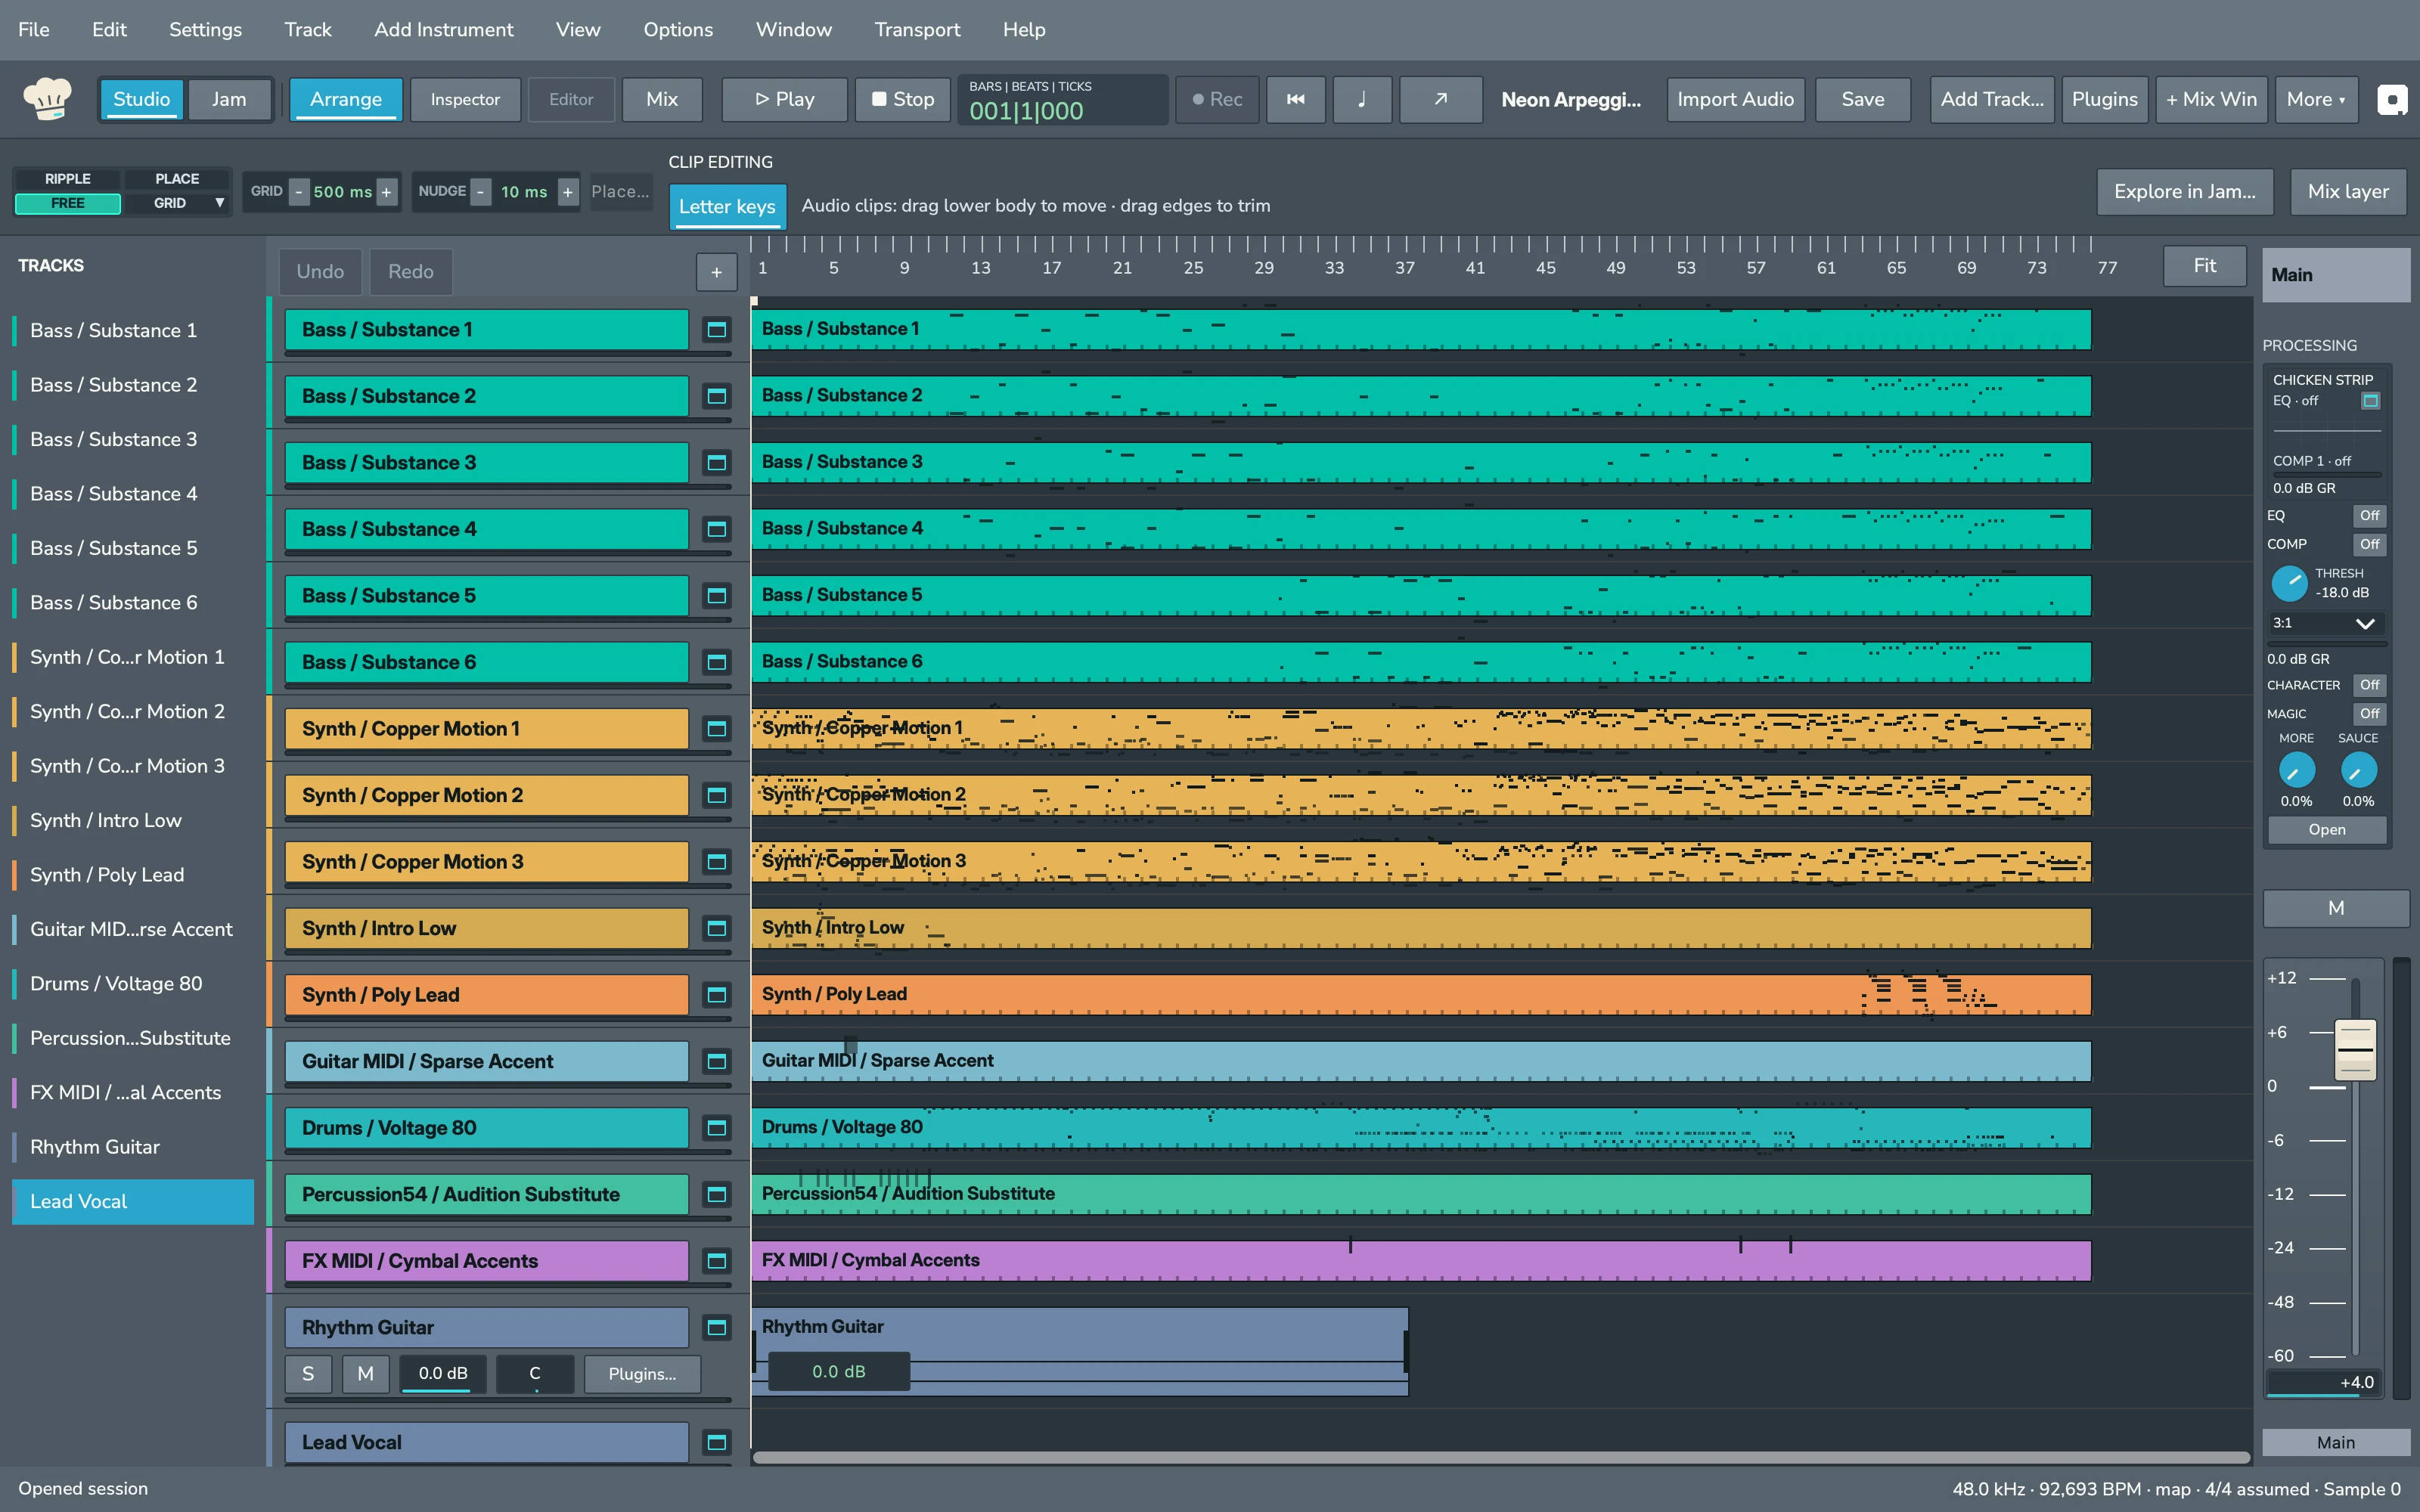
Each track has a header to the left of its lane. From left to right and top to bottom, a header at the default Large height shows these controls.
- Color stripe: a thin bar in the track's color along the left edge.
- Name button: shows the track's name on its color. Click it to select the track. Point at it to see the full name when it is too long to fit.
- Source row: on an audio track, the input button and the Arm button; on an instrument track, Open for its sound editor, Edit notes for its Piano Roll, and the number of MIDI notes on the track. Edit notes also works when the track has no notes yet.
- Mix row: S, M, the gain readout, the pan readout and the plugins button. Each is described below.
- Level meter: a thin meter along the bottom of the header.
The input button reads Choose input… until you pick an input, then shows the device and channel, for example Interface · Input 1. It reads Input unavailable when that device is not connected. Click it to open the Mono recording input window; see Recording audio.
The Open button carries the instrument's name, for example Open Octet, and opens the instrument's editor. See MIDI and instruments.
Right-click anywhere on the header to select the track and open its menu; see Use the track header context menu.
Arm #
Arm readies an empty audio track for recording. It turns red while the track is armed. It works only on an audio track with no clip, or on the track that is already armed; on any other track, its tip reads Choose an empty audio track for a new take. While a take is being prepared or recorded, it reads Finish recording before changing the armed track.
S and M #
S solos the track and turns yellow; M mutes it and turns orange. Click again to turn them off. See Solo and mute.
Gain and pan readouts #
The gain readout shows the track's fader level with one decimal, for example 0.0 dB, +1.5 dB or -12.0 dB. The pan readout shows C for center, or L 20 and R 35 for left and right.
- Drag up to raise the value and down to lower it. Gain moves 0.25 dB and pan one step for each point you drag.
- Hold ⌘ while dragging for steps five times smaller.
- ⌥-click to reset gain to 0.0 dB or pan to center.
- Press Esc during a drag to cancel it.
Gain runs from -60 dB to +12 dB and pan from 100 left to 100 right, the same as the fader and pan knob in Mix. The readouts appear only when the window is at least 960 points wide; in a narrower window, set gain and pan in Mix.
Plugins #
The plugins button reads Plugins… on a track with no plugins, and shows the count when it has some, for example Plugins · 2. Click it to open the track's insert slots. See Plugins.
Level meter #
The meter shows the track's output level. While the track is armed and Head Chef is ready to record, counting in or recording, it shows the input level instead. Its top turns red when the signal goes over full scale and stays red until you click the meter.
What each height shows #
| Height | Size in points | The header shows |
|---|---|---|
| Jumbo | 220 | Everything, with extra room |
| Large | 128 | Everything; this is the default height |
| Medium | 76 | Name, mix row and meter; no source row |
| Small | 44 | Name and meter |
| Tiny | 28 | A compact name button only |
| Micro | 18 | A compact name button only |
On short tracks, use the track header context menu, the TRACKS list or the Inspector for the controls the header hides.
Select tracks #
- Click a track's name button, or click its clip in the timeline.
- With the Arrange timeline focused and letter shortcuts on, press P for the previous track and ; for the next.
- In a window at least 1600 points wide, a TRACKS list runs down the left edge. Click a name there to select that track. Each row shows the track's color and name, is indented when the track sits in a folder, and carries a small badge when the track belongs to a group.
Many commands act on the selected track, such as the solo, mute, arm and height shortcuts below.
Name and color tracks #
Give a track its name and color when you create it in the Add Track dialog. Tracks created from the menus get a name and color from Head Chef, and imported tracks take their names from their files.
Head Chef 1 has no command in the app window to rename or recolor an existing track. A tool linked through the assistant connection can set a track's name and color; see Control and automation.
Solo and mute #
- Click S to solo a track or M to mute it. Click again to turn it off.
- To use the keyboard, select the track and, in Arrange or Mix, press ⇧S for solo or ⇧M for mute.
You can also right-click a track header and choose Toggle Solo or Toggle Mute.
While Head Chef is preparing or recording a take, solo, mute and the reset commands are refused with Stop recording or cancel record readiness before changing the session. Finish or cancel the take first.
Arm a track for recording #
Click Arm on an empty audio track, or select it and press ⇧R. The Arm button stays lit while the track is armed. Only empty audio tracks can be armed for a new take. Recording audio covers the full recording steps.
Change track heights #
- View > Taller Selected Track and View > Shorter Selected Track, or ⌘↑ and ⌘↓ with the Arrange timeline focused, step the selected track through Micro, Tiny, Small, Medium, Large and Jumbo.
- View > Taller All Tracks and View > Shorter All Tracks, or ⌥⌘↑ and ⌥⌘↓, step every track together.
- Right-click a track header and choose Track Height to pick a size directly.
The height steps stop at Micro and Jumbo. Height changes are steps in the edit history, so Undo restores the previous height. What each height shows lists the controls each size keeps. To make quiet audio easier to see without changing its sound, use View > Taller Waveforms and View > Shorter Waveforms.
Use the track header context menu #
Right-click a track header to open its menu:
| Command | What it does |
|---|---|
| Toggle Solo | Turns solo on or off. |
| Toggle Mute | Turns mute on or off. |
| Reset Gain to 0.0 dB | Returns the track's level to 0.0 dB. |
| Reset Pan to Center | Returns the track's pan to center. |
| Track Height | Sets the track to Micro, Tiny, Small, Medium, Large or Jumbo. |
| Plugins… | Opens the track's insert slots. |
| Open plugin name | Opens the editor of the track's first plugin. It appears only when the track has a plugin, and reads Open Plugin Editor when the plugin has no name. |
| Add Track | Adds a mono audio track or an instrument track. |
Folders, groups and VCA masters #
A session can hold folders, groups and VCA masters, for example when it comes from another session file or was organized through the assistant connection. In the app window you see and use them like this:
- Folders: tracks inside a folder are indented in the TRACKS list. A routing folder appears in Mix as a FOLDER BUS strip. It works like an Effect Return: each track in the folder sends to it at 0 dB, and the tracks also keep playing straight to Main. See The signal path of a channel. Click Spill Folder on that strip to focus the mixer on the folder's tracks; the button reads Spilling Folder while it is on.
- Groups: a track in a group shows the group's label in the TRACKS list. Depending on how a group is set up, edits, faders, mute and solo on one member apply to the others. To work on one track on its own, press ⇧⌘G in Arrange to suspend all groups, and press it again to resume them.
- VCA masters: a VCA master appears in Mix as a VCA MASTER strip labeled with its group. It scales the level of its group's tracks without carrying audio itself. Click Spill to focus the mixer on its members.
- Hidden tracks: a track hidden from Arrange appears dimmed in the TRACKS list.
Consolidate a VCA master #
When a VCA master's level is where you want it, you can write it into its members:
- In Mix, find the VCA MASTER strip.
- Click Coalesce.
Head Chef moves the VCA master's level offset into each member track's fader and returns the VCA master to 0 dB when it can preserve the mix. Undo reverses the change.
If coalescing would change an active Read volume ride, Head Chef refuses the change and keeps the VCA. Deleting a VCA normally coalesces its level first, so that operation is also refused when the ride would change. Keep the VCA to preserve its adjustment. To remove the adjustment deliberately, ask the assistant to delete the VCA without coalescing; this changes the members' levels and can be undone. See Volume automation.
Creating, editing and deleting folders, groups and VCA masters, and showing or hiding tracks, is done through the assistant connection. See Control and automation.